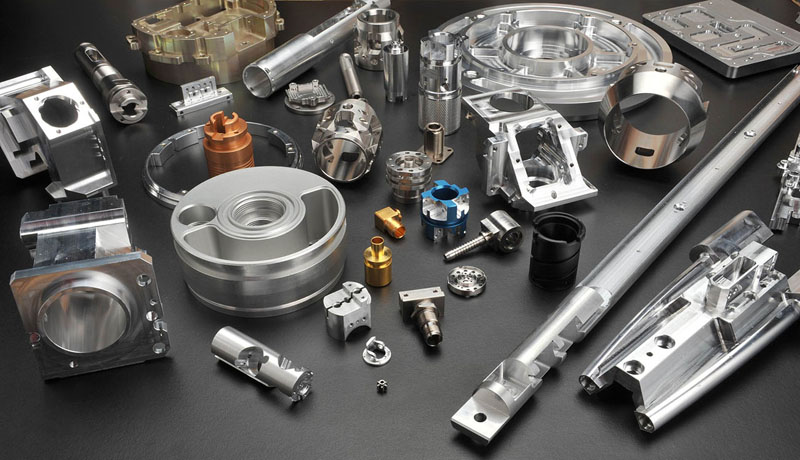
Preparing for a custom machining project involves several key steps to ensure a successful outcome. Here’s a comprehensive guide on how to prepare for a custom machining project:
1. Define Project Requirements:
Clearly define the specifications, including dimensions, tolerances, materials, and surface finishes required for the machined parts.
Identify any special features, such as threads, holes, pockets, or complex geometries, that need to be incorporated into the parts.
Determine the desired quantity of parts to be produced, as well as the project timeline and budget constraints.
2. Select a Suitable Machining Method:
Evaluate different machining methods, such as CNC milling, turning, drilling, or grinding, based on the project requirements and part geometry.
Consider factors like material compatibility, machining accuracy, surface finish requirements, and production volume when selecting the appropriate machining method.
3. Choose the Right Material:
Select a material that meets the mechanical, thermal, and chemical requirements of the application.
Consider factors such as strength, hardness, corrosion resistance, and thermal conductivity when choosing the material for the machined parts.
Common materials used in custom machining projects include metals (aluminum, steel, titanium), plastics (ABS, acrylic, PEEK), and composites.

4. Understanding And Using CAD/CAM Programming
CNC machining projects require AD (AutoCAD) and CAM (Computer Aided Manufacturing) programming software. AD produces 2D and 3D designs, while CAM creates tool paths that guide CNC machines through cutting and shaping materials.
To begin this programming effort, the design must be developed in AutoCAD. This requires drawing the required part or assembly using a variety of tools and techniques. Once the design is complete, it can be saved in a variety of formats, including DXF and DWG.
The design is then imported into the CAM software. This requires launching the CAM software and selecting the file format for the design. Afterwards, the CAM program reads the file and creates a 3D model of the part or assembly.
Once the 3D model is built, toolpaths are created. Both must select the appropriate cutting tool and determine the path the tool will take to cut and shape the material. The CAM program will generate a G-code file with CNC machine tool processing instructions.
Next, you have to configure the CNC machine: After generating the G-code file, the next task involves configuring the CNC machine. You also need to load the G-code file onto the machine and select the correct cutting tool. The equipment must also be calibrated to ensure optimal material alignment.
After the system configuration is complete, it is time to launch the software. This requires starting the machine and monitoring the process to verify that the material is cut and shaped appropriately. Any errors or problems that arise during processing must be addressed immediately to avoid damage to the material or machine.
5. Communicate with Machining Service Providers:
Research and identify reputable machining service providers or CNC machine shops with expertise in custom machining.
Provide the machining service provider with detailed information about the project requirements, including CAD drawings, material specifications, and quantity requirements.
Discuss any special considerations or challenges related to the project, such as tight tolerances, complex geometries, or specific surface finish requirements.
6. Finishing Operations
Finally, finishing is crucial in CNC machining projects as it ensures the product has the desired surface finish and appearance. Here are some things to do in the final steps of your CNC machining project:
Burrs and sharp edges should be removed: Burrs and sharp edges left on a product during machining can be harmful and hinder product performance. These burrs and sharp edges should be removed during finishing using deburring tools or other methods.
Smooth surface finish: Depending on the needs of the project, the surface finish of the product may need to be smoothed to enhance its appearance or performance. This can be done with abrasive materials like sandpaper or polishing chemicals.
Coatings or finishes: Depending on the product’s application, coatings or finishes may be required to protect it from corrosion or wear. Anodizing, powder coating, and painting are common coatings used in CNC machining applications.
7. Consider Prototyping and Testing:
If feasible, consider creating prototypes or test parts to validate the design and functionality before proceeding with full-scale production.
Prototyping allows for iterative refinement of the design and helps identify any potential issues or improvements early in the process.
8. Review and Approve Quotes:
Obtain quotes from multiple machining service providers and compare them based on factors such as pricing, lead times, quality assurance measures, and customer service.
Review the quotes carefully, ensuring that they accurately reflect the project requirements and any additional services or requirements discussed.
Select the machining service provider that offers the best combination of quality, cost, and lead time for the project.
9. Monitor Progress and Communicate:
Maintain regular communication with the machining service provider throughout the project to address any questions, concerns, or changes that may arise.
Monitor the progress of the project closely, ensuring that it stays on schedule and meets the agreed-upon specifications and quality standards.
By following these steps and thoroughly preparing for your custom machining project, you can ensure a smooth and successful manufacturing process and achieve high-quality machined parts that meet your specific requirements and expectations.


