


Anodizing is more than just a finishing touch; it’s an electrochemical engineering process that transforms a raw machined part into a durable, corrosion-resistant, and aesthetically pleasing final product. For us in the CNC machining world, achieving a perfect anodized finish—especially with consistent color across a batch—is a mark of true quality. However, the process is notoriously sensitive. A flawless finish is not the sole responsibility of the anodizer; it is the culmination of meticulous practices that begin at the CAD model and continue through every stage of manufacturing.
Here are the essential best practices, from a machinist’s point of view, to ensure superior anodizing results.
1. Pre-Anodizing: The Foundation is Laid on the Mill
The anodizing process doesn’t hide imperfections; it accentuates them. The most critical work happens in your shop long before the parts are sent for finishing.
A. Strategic Material Selection
Not all aluminum alloys anodize equally. The alloying elements directly influence the structure, clarity, and color of the final anodic layer.
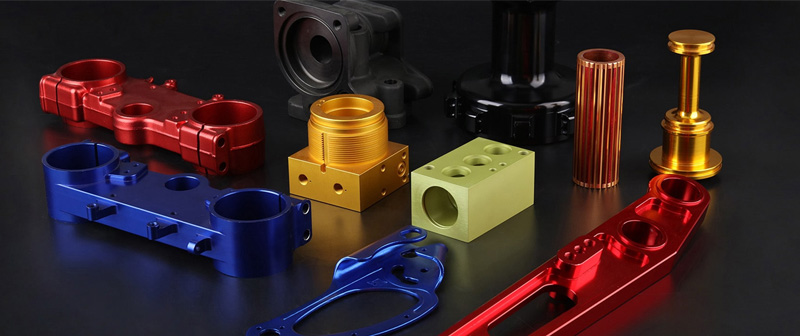
The Gold Standard (6000 Series): Alloys like 6061 are the industry favorite for decorative anodizing for a reason. Their magnesium and silicon content allows for the growth of a clear, uniform, and porous anodic layer that accepts dyes predictably, resulting in deep, consistent colors
The High-Strength Challenge (7000 & 2000 Series): Alloys like 7075 (high zinc) and 2024 (high copper) are prized for their strength but are notoriously difficult to anodize for cosmetic purposes. Their alloying elements can create a yellowish or murky oxide layer, making clear or light colors difficult to achieve. Colors will often appear muted or “smoky.” When using these alloys, expect color variation and communicate this to your client upfront.
Consistency is Key: For a project with multiple components that need to match, always use the same alloy from the same material supplier. Even minor variations in composition between batches can lead to noticeable color shifts after anodizing.
B. Machining with the Finish in Mind
The texture and quality of the machined surface directly impact how light reflects off the part after anodizing, which is the essence of color perception.
Consistent Surface Finish: Use sharp, consistent tooling and maintain a steady feed rate and spindle speed (SFM/SMM) across all cosmetic surfaces. Any change in cutting parameters can create subtle differences in the surface texture that will become obvious after anodizing. Tool chatter, dwell marks, or burnishing from a dull tool will be glaringly visible.
Avoid Hand Sanding and Inconsistent Deburring: Automated or controlled deburring processes like tumbling are preferable to manual methods. Hand sanding or filing can create an inconsistent surface texture that will absorb dye differently than the machined surface, resulting in blotches or uneven color.
Coolant Management: Use a high-quality, clean coolant. Old, contaminated coolant can leave behind microscopic residues that interfere with the chemical pre-treatment and anodizing process, leading to staining or spotting.
Post-Machining Surface Prep: If a uniform matte finish is desired, bead blasting is an excellent option. However, the blasting media, pressure, and duration must be strictly controlled for every part in the batch to ensure a consistent starting surface.
2. Surface Preparation: The Chemical Cleaning Stage
Once the parts arrive at the anodizer, they undergo a series of chemical baths before the main event. This pre-treatment is crucial for adhesion and uniformity.
Degreasing: The first step is a thorough cleaning to remove all oils, coolants, and soils from the machining process. Any residue will prevent the subsequent chemicals from working uniformly.
Etching: An alkaline etch is used to remove the thin, natural oxide layer on the aluminum and to smooth out very minor machining lines, resulting in a more uniform matte (satin) finish. Over-etching can remove too much material, affecting dimensional tolerances, and can also bring alloying elements to the surface. The duration of this step is critical for a consistent appearance.
De-smut/Deoxidizing: After etching, a residue of alloying elements (the “smut”) is often left on the part’s surface. A de-smut bath (typically an acid solution) removes this residue. An incomplete de-smut is a primary cause of splotchy or inconsistent anodizing, especially on high-alloy series like 2000 or 7000.
3. The Anodizing & Dyeing Process: Controlled Transformation
This is the electrochemical stage where the magic happens. The part becomes the anode (positive electrode) in an acid bath.
Building the Anodic Layer (Type II vs. Type III): For color, we typically refer to Type II (Sulfuric Acid) Anodizing. This process grows a porous aluminum oxide layer on the surface. The thickness and porosity of this layer are controlled by three factors: bath temperature, current density, and time. Any deviation in these parameters will change how the part absorbs dye, directly affecting the color’s shade and depth.
Dyeing: After the oxide layer is formed, the parts are immersed in a dye tank. The porous, unsealed layer absorbs the organic dye. The final color is a function of dye concentration, temperature, and immersion time. For light, consistent colors, this step requires extreme precision.
4. Sealing: Locking in Color and Performance
Sealing is the final and one of the most vital steps. This process closes the microscopic pores of the anodic layer, trapping the dye particles inside and creating a surface that is resistant to corrosion, UV degradation, and staining.
Sealing Methods: The most common method is a hot deionized water or steam seal, which hydrates the aluminum oxide, causing it to swell and close the pores. Mid-temperature seals using chemicals like nickel acetate are also common and can offer superior performance.
Consequences of Poor Sealing: An improperly sealed part will exhibit poor colorfastness, “bleed” dye when cleaned, and have significantly reduced corrosion resistance. The surface may feel sticky or chalky to the touch.
Conclusion: A Partnership for Perfection
Achieving a perfect, consistent anodized finish is a testament to disciplined manufacturing from start to finish. It requires clear communication and a partnership between the machine shop and the anodizing facility. By controlling every variable—from the initial material purchase and machining strategy to the final sealing process—we can transform a simple CNC machined part into a product of exceptional quality and lasting performance.